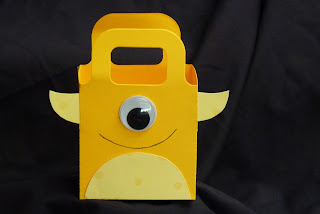
I saw some little monsters like these on the front of Cricut Magazine this month and thought I would try my hand at them.
I started with a bunch of die-cut gift bags in assorted colors. I die-cut mine at the school where my husband teaches, but you could also find a pattern online, or use Cricut's Tags, Bags Boxes and More Cartridge, and I've also seen some plain white ones at the Dollar Store in their Party Favor/Wedding Favor section. Any die-cut gift bag will work.To attach wings or horns, I used my self-healing mat and exacto knife and cut slits along the front edges of the box just long enough to slide my cut pieces in.
This is what the wings look like attached from the inside of the box.
These are horns and wings.
I'm including patterns for my horns, wings (2 types), bellies, teeth, and mouths. I used a variety of carstock pattern paper, textured paper, and cardstock to cut these pieces with. Just remember when cutting wings/horns that the stiffer carstock-type paper works best/ I used googly eyes of different sizes. I found a bag at the dollar store that had 3 sizes in it of about 100 eyes. Really the sky's the limit when creating these little monsters. Alternate the pieces to create different looking monsters!
 |
| Cyclops |
 |
| Fuzzy paper and scalloped scissor circle (You could also use a flower punch) |
 |
| Add a ribbon bow and eyelashes to create a girl monster. I also turned the horns upside down. |
 |
| Velvet paper |
 |
| Textured paper |
 |
| Mulberry paper |
The patterns for wings, teeth, bellies, etc. are on Heather's blog. Click the link below to get to them!
http://smallfryandco.blogspot.com/2011/10/little-monster-bags.html


No comments:
Post a Comment